What can I said...I love reptiles! big, small you name it...LOL. But if you want to learn some texturing and coloring techniques take a look at this tutorial because its full of good info for you ;)
For this project you will need:
- Knife.
- Brush
- Modeling tool.
- #1 Tip
- Brown fondant.
-Green and Brown edible dust.
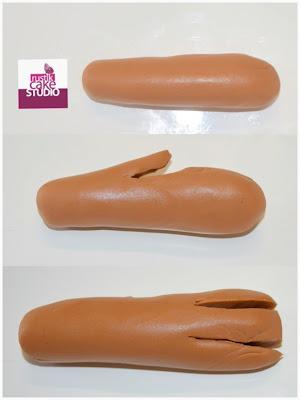
Roll the fondant. On the outer center make a cut, this will be the back toe. Then flip it over, and make 2 cuts for the 3 from toes.
With your fingers roll the toes to make them round. Shape the feet ..LOL...sorry I have to laugh because it looks like fat chicken feet! With the back of your exacto knife make make some circles on the tiptop of the toes.
This is the best part, adding all this different textures to the feet. So the first texture for the skin is by using the tip. Make the imprints on the feet with the tip all over, then give some definition to the toes with your modeling tool and last using the back of the sharp side of your knife make the creases for the skin.

Before we actually color the feet we are going to finish it but the nails. To make the nails you will need a small piece of fondant shaped into a cone. Then make the tip a little longer and bend it a bit. And is ready to be glue to your toes :)

It is very easy to color it. Our base color will be the brown from the fondant. Here it depends on how green or how brown you want your Dinosaur to be. I'm using petal dust in green to give some color to my feet then I diluted a little of the brown dust into a couple of drops of vodka and give some dimension to the creases and painted the nails. An is basically done and ready to decorate your cake !


No comments:
Post a Comment